advertise

Step-by-Step Flower Drawing Nail Art: A Beginner's Guide

Elevate Your Nail Game with Stunning Floral Designs

Are you ready to transform your nails into a blooming masterpiece? This step-by-step guide will teach you how to create beautiful flower nail art, even if you're a beginner.

Essential Nail Art Supplies

Before we dive into the creative process, let's gather the essential tools:

Nail Art Brushes

A variety of sizes and shapes to create intricate details.

Dotting Tools

For adding dots, circles, and other small elements.

Acrylic Paints

High-quality paints in various colors.

Nail Polish

A base coat, top coat, and your favorite color for the background.

Nail Extensions

To create a longer canvas for your art.

Preparing Your Nails

A well-prepared canvas is the foundation of any great artwork. Follow these steps:
1. Clean and Shape Nails: Cleanse your nails and shape them to your desired length and shape.
2. Apply Base Coat: A base coat protects your nails and helps the polish adhere better.
3. Apply Nail Color: Choose a color that complements your flower design and paint it evenly on your nails.

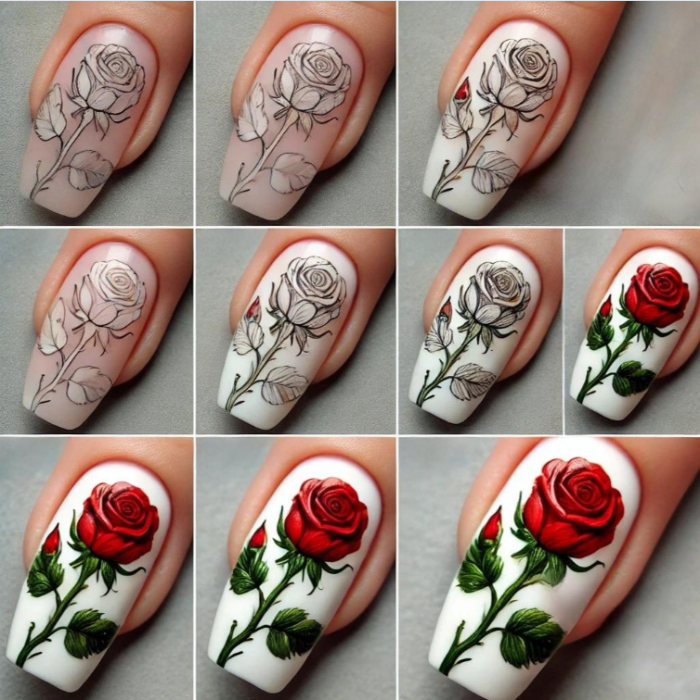
Basic Flower Painting Techniques

Mastering these fundamental techniques will help you bring your floral designs to life:

Petals Painting

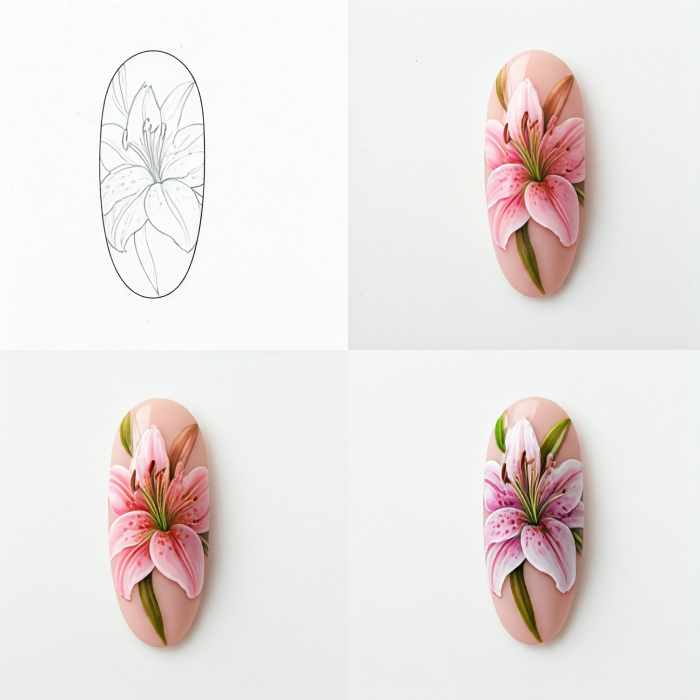
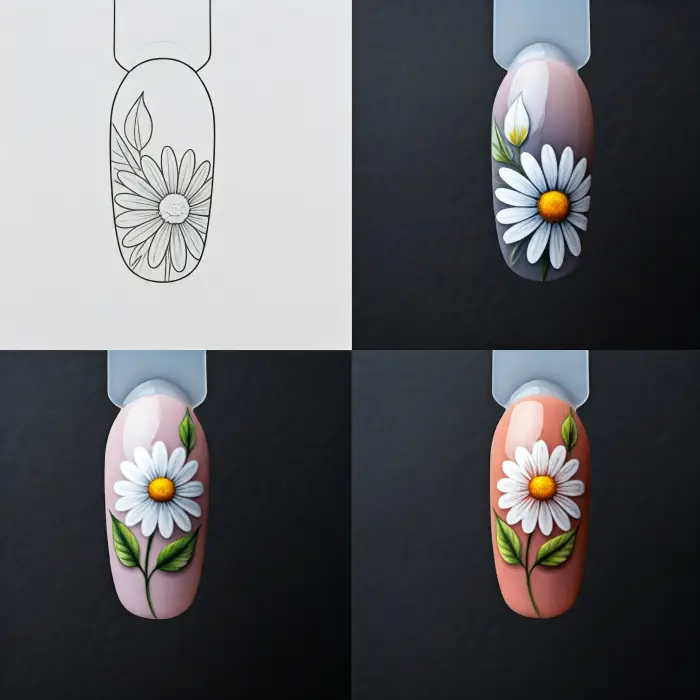
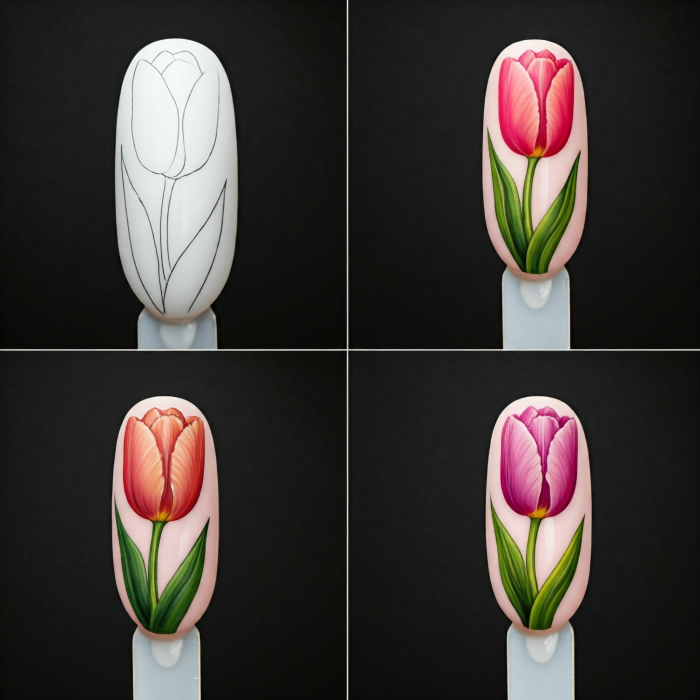
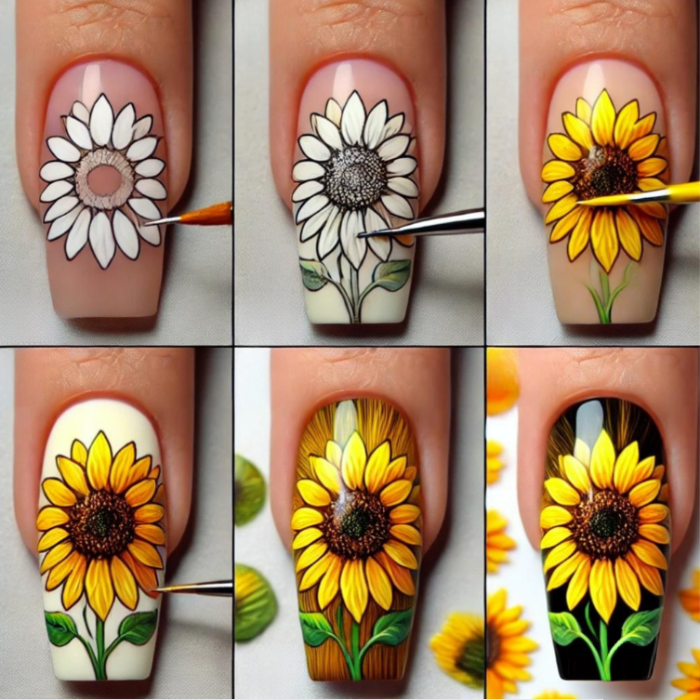
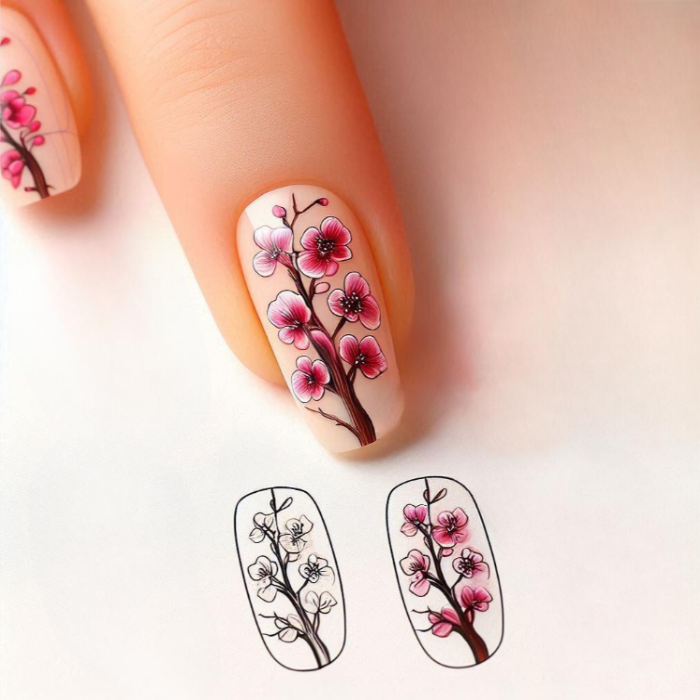
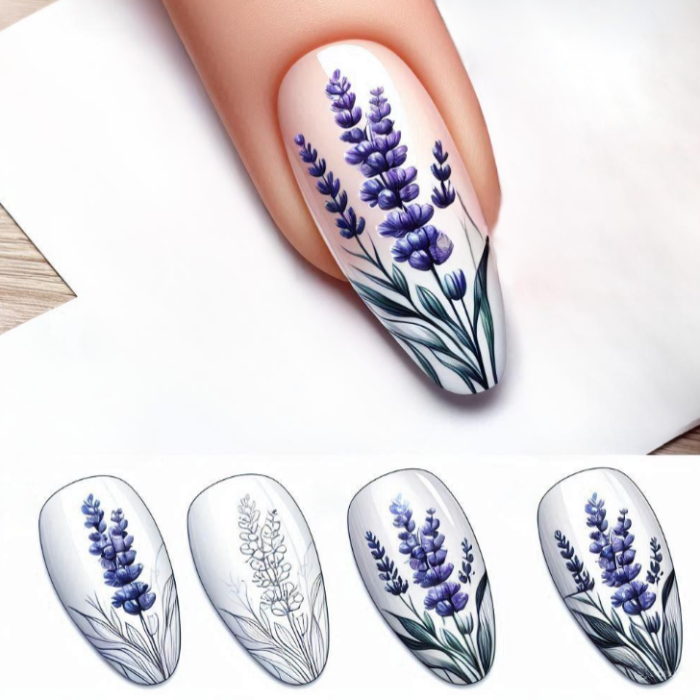
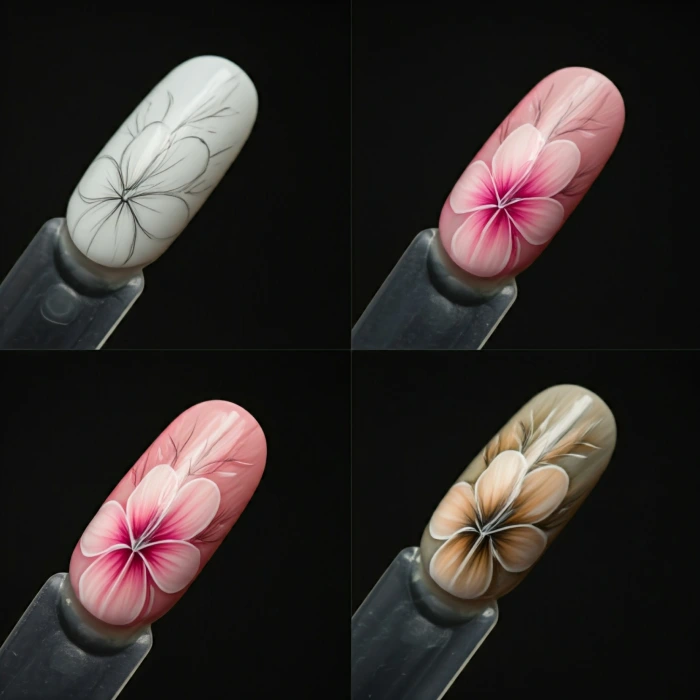
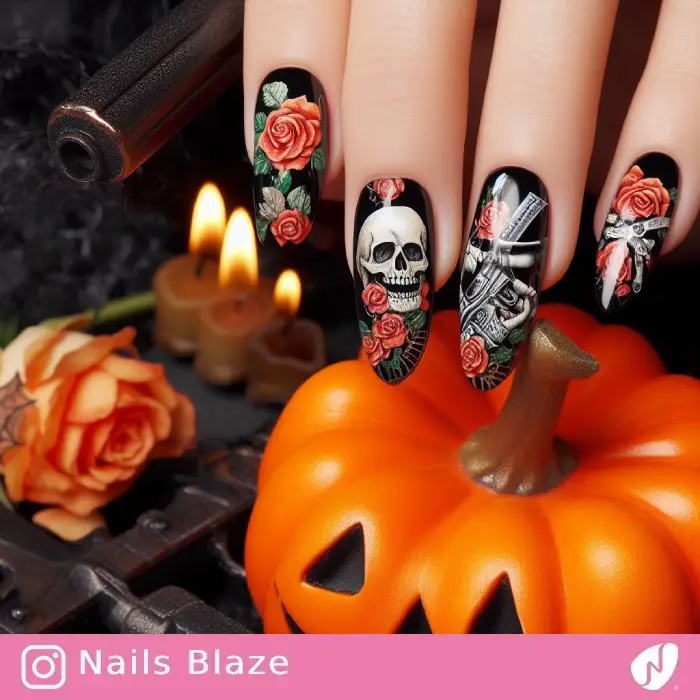
Use delicate brushstrokes to create realistic or stylized petals.

Leaves Painting

Paint leaves in various shapes and sizes, adding veins for detail.

Stems Painting

Use a thin brush to paint elegant stems.

Bud Painting

Add tiny buds to complete your floral arrangement.

Popular Flower Nail Art Designs

Explore these popular flower designs to inspire your creativity:

Rose Nail Art

Lily Nail Art

Daisy Nail Art

Tulip Nail Art

Sunflower Nail Art

Cherry Blossom Nail Art

Lavender Nail Art

Adding Finishing Touches

Elevate your designs with these finishing touches:
Apply Top Coat: Seal your artwork with a top coat to protect it and add shine.
Add Rhinestones and Glitter: Add sparkle and glamour with rhinestones and glitter.
Create 3D Effects: Use acrylic paint to create raised flowers for a dimensional look.

Tips and Tricks for Perfect Flower Nail Art

• Practice Makes Perfect: The more you practice, the better you'll become.
• Start with Simple Designs: Begin with basic designs and gradually increase complexity.
• Use High-Quality Supplies: Invest in quality supplies for the best results.
• Clean Your Brushes Regularly: Keep your brushes clean to maintain their shape and prevent color mixing.
• Experiment with Different Colors and Techniques: Don't be afraid to experiment and find your unique style.

Inspirational Flower Nail Art Ideas

Here are some creative ideas to spark your imagination:
Minimalist Flower Nail Art: Keep it simple and elegant with minimalist designs.
Bold and Colorful Flower Nail Art: Embrace vibrant colors and bold patterns.
Ombre Flower Nail Art: Create a gradient effect with your flower designs.
Watercolor Flower Nail Art: Achieve a soft and dreamy look with watercolor techniques.
Geometric Flower Nail Art: Combine geometric shapes with floral elements for a modern twist.
Floral Forest Green Nails for Office | Professional Nails - NB3070

Fuchsia Flowers for Tropical Rainforest Nails | Hawaii Nails - NB4052

Embellished Black Easter Nail Art | Easter Nails - NB3566

Sunflower Nail Art | Thanksgiving | Holiday- NB1091

Flower-effect Double French Nails

Molnar.mariann

Floral and Cross Nail Art for Easter | Easter Nails - NB3426

Read the Latest on Nails Tails!

Nails Blaze / Nailstales / Step-by-Step Flower Drawing Nail Art
Let Us Know Your Ideas and Suggestions