advertise
Nails Blaze / Nailstales / 10 Egg-cellent Easter Nail Art Ideas for 2025

Celebrate with Easter Nails 2025: Designs for Every Style

10 Egg-cellent Easter Nail Art Ideas for 2025

Spring is all about fresh beginnings, pastel hues, and playful creativity—and what better time than Easter to showcase an inspired nail art look? In 2025, nail art is evolving past the “tacky” clichés to embrace designs that are sophisticated, fun, and utterly egg-cellent. Whether you’re a DIY enthusiast or a salon regular, these 10 ideas will help you achieve a festive yet chic Easter manicure that turns heads and fuels your creativity.
Below, we dive deep into each design idea with detailed instructions, pro tips, and the latest nail trends to help you craft your very own springtime masterpiece.

1. Pastel Eggstravaganza

The Concept:
Transform each nail into a miniature Easter egg with a different pastel base. Mix subtle shades like baby pink, mint green, lavender, sky blue, and butter yellow to mimic the playful patterns found on decorated eggs.
How to Create It:
• Base Prep: Start with a quality base coat that smooths the nail surface.
• Color Application: Apply one pastel shade per nail using a thin, even layer of UV gel or high-quality nail polish.
• Detailing: Use a dotting tool or a fine brush to add stripes, tiny dots, or swirls—reminiscent of hand-painted Easter eggs.
• Finishing Touch: Seal your design with a glossy or matte top coat based on your preference.
Pro Tip: Experiment with layering different textures (matte on one nail, glossy on another) to create an eye-catching assortment.

more

less

2. Bunny Holding Egg: A Whimsical Touch

The Concept:
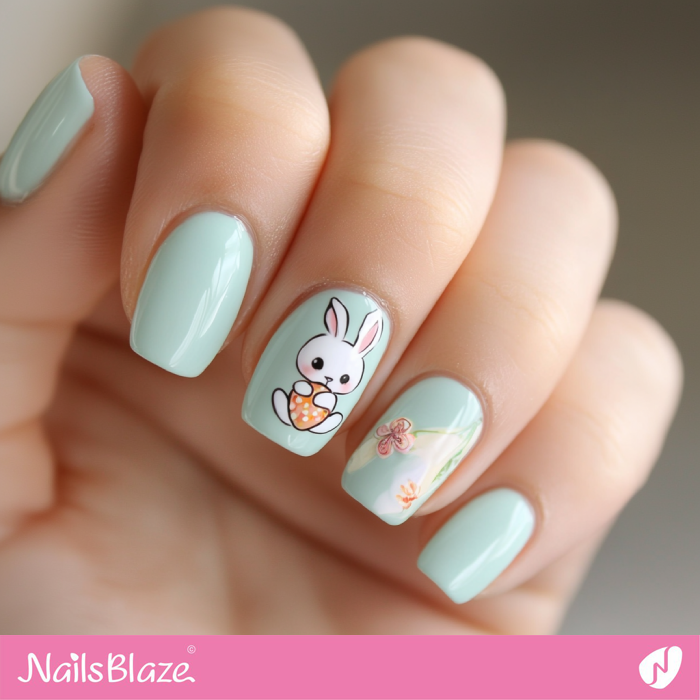
Celebrate Easter by featuring a charming design where a bunny is portrayed tenderly holding an Easter egg. This design transforms the traditional bunny motif into an artful depiction that symbolizes the union of two classic Easter icons. Use this design as an accent on one or two nails to keep the overall look balanced while making a striking statement.
How to Create It:
• Step 1: Preparation Begin with a protective base coat to ensure your nail surface is smooth and ready for detailed artwork.
• Step 2: Base Color Application 
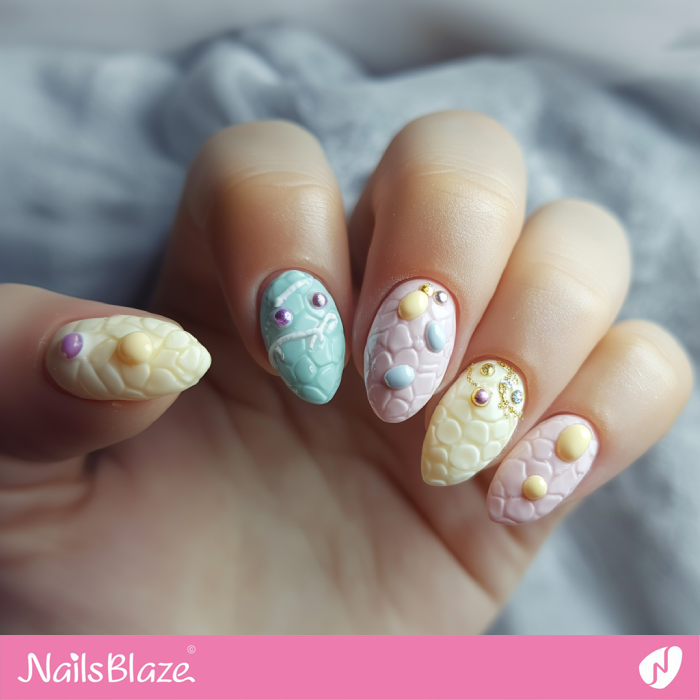
Choose a soft pastel shade  such as pale pink, mint, or baby blue) as the base. Apply one or two thin layers and allow each coat to dry fully.
• Step 3: Sketching the Design On an accent nail, use a fine-tipped nail art brush or a dotting tool to outline a simple bunny figure in profile. Focus on creating a gentle curve for the bunny’s body and an extended front paw holding a small, round egg.
• Step 4: Adding Details Fill in the bunny with a light color—using white, cream, or a soft pastel hue—and add minimal features like delicate eyes, a tiny nose, and subtle whiskers. For the egg, choose a contrasting yet complementary color, and consider adding simple decorative elements such as polka dots or a small floral pattern.
• Step 5: Sealing the Artwork Once your design is complete and dry, apply a clear top coat to protect your artwork and enhance shine, ensuring the design lasts longer.
Pro Tip: If freehand painting presents a challenge, high-quality bunny and egg decals are a great alternative. They allow you to achieve a detailed and uniform design without compromising on creativity.

more

less

3. Floral Egg Hue

The Concept:
Combine the natural beauty of spring florals with Easter egg inspiration. Picture your nails as canvases where delicate blossoms overlay a soft, egg-inspired base.
How to Create It:
• Base: Paint your nails a light, neutral pastel (think soft nude or pale pink).
• Floral Art: Using a fine nail brush or dotting tool, hand-paint tiny flowers like daisies or cherry blossoms over the base.
• Accent: Outline a few flowers with subtle metallic or contrasting colors to add dimension.
• Seal: Lock in your art with a clear, glossy top coat.
Pro Tip: For beginners, floral nail stickers work wonders when applied precisely on an egg-colored background.

more

less

4. Matte Eggshell Speckles

The Concept:
This design channels the understated yet elegant allure of natural eggshells. A matte finish paired with a speckled effect recreates the texture of hand-decorated Easter eggs.
How to Create It:
• Matte Base: Apply your favorite pastel polish and cure it.
• Matte Top Coat: Once dry, seal with a matte top coat for a smooth, non-shiny finish.
• Speckle Detailing: With a fine-tipped brush, add irregular dots in a darker tone (gold, deep brown, or charcoal) to mimic natural speckles.
• Final Seal: Reapply a thin layer of matte top coat to secure the speckles.
Pro Tip: Vary the size and spacing of the speckles for a more natural, artistic effect.

more

less

5. 3D Egg Embellishments

The Concept:
For those ready to take their Easter nail art to the next dimension, 3D embellishments shaped like small eggs add a bold twist.
How to Create It:
• Base & Primer: Start with a well-prepped nail bed and a clear base coat.
• 3D Elements: Apply 3D gel appliques or sculpted egg charms using gel products. These can be set on a pastel background with accents like glitter or metallic foil detailing.
• Curing: Cure under an LED lamp and finish with a strong top coat for lasting durability.
Pro Tip: Use egg-shaped nail charms sparingly on an accent nail to let them truly stand out without overwhelming the design.

more

less

6. Ombre Egg-celence

The Concept:
Create a soft gradient—an ombre effect that mirrors the delicate color shifts seen on hand-dyed eggs.
How to Create It:
• Foundation: Begin with a base coat, then apply two complementary pastel shades (e.g., baby blue fading into lavender).
• Technique: Use a makeup sponge to gently dab the polish on each nail, blending the colors seamlessly.
• Detailing: Smooth the edges with a thin brush for a refined look.
• Seal: Finish with a glossy top coat for a brilliant shine.
Pro Tip: Experiment with different color pairings to reflect your unique style; some combinations may evoke the soft morning light of an Easter sunrise.

more

less

7. Geometric Egg Stripes

The Concept:
Mix modern art with traditional motifs by incorporating clean, geometric lines inspired by decorative egg patterns.
How to Create It:
• Base Color: Use a uniform pastel base across your nails.
• Design: With nail striping tape or stencils, create sharp geometric segments on the nail. Then use a contrasting polish to paint stripes or blocks that mimic decorated egg designs.
• Removal and Finishing: Remove the tape carefully and seal with a high-shine top coat.
Pro Tip: For an edgy twist, try a half-moon or diagonal geometric pattern in an unexpected pastel like pistachio green.

more

less

8. Glittery Eggshine

The Concept:
Add sparkle to your Easter nails for a look that’s both festive and high fashion. Glitter accents can transform simple designs into dazzling works of art.
How to Create It:
• Preparation: Apply your base color (a soft pastel is ideal).
• Glitter Application: Use a glitter polish or loose glitter mixed with a clear base to create a textured layer reminiscent of the shimmer on decorative eggs.
• Technique: For a refined look, try a gradient glitter effect that is heavier on the tips and fades as it reaches the base.
• Seal: Cure or set with a top coat to lock in the glitter.
Pro Tip: Use fine, holographic glitter for a sophisticated twist that catches the light beautifully.

more

less

9. Vintage Egg Prints

The Concept:
Channel retro vibes by drawing inspiration from vintage wallpaper prints featuring floral and egg motifs. This design offers a nostalgic yet modern twist.
How to Create It:
• Base: Start with a neutral or softly tinted base coat.
• Prints: Use thin nail art brushes to hand-paint delicate, vintage-inspired patterns—think faded florals interspersed with tiny egg shapes.
• Color Choice: Stick with muted tones such as dusty blue, soft mauve, or vintage mustard to evoke a retro charm.
• Finish: Apply a glossy top coat for a smooth finish that enhances the intricate patterns.
Pro Tip: If hand-painting seems intimidating, consider using stamping plates or decals designed for vintage prints to ease the process.

more

less

10. Egg-citing Negative Space

The Concept:
For a modern minimalist look, use negative space nail art to create egg-inspired designs. Leaving parts of your nail bare can produce a striking, chic result.
How to Create It:
• Base Coat: Apply a protective base coat and choose a pastel polish for a partial base.
• Design Approach: Use tape or nail stencils to block off areas you’d like to remain untouched. Then, paint over the exposed sections with another complementary color. Once dry, remove the tape to reveal clean negative space reminiscent of a half-painted egg.
• Final Touch: For extra detail, add tiny dots or lines along the border where the colors meet, and seal with a top coat.
Pro Tip: Negative space designs work exceptionally well on longer nail shapes (like almond or coffin shapes) to emphasize clean lines and modern sophistication.

more

less

Easter 2025 is set to be a season of reinvention in nail art—where tradition meets innovation. Whether you choose a playful, egg-inspired look or a refined, minimalist design, these 10 egg-cellent ideas promise to elevate your manicure beyond basic holiday themes.
Embrace pastel palettes, experiment with textures, and let your creativity run as wild as an Easter egg hunt. Try one (or mix and match several) to make your nails not just festive but a true expression of your unique style. And remember: a fresh set of nails isn’t just a beauty accessory—it’s a celebration of the season’s vibrant energy.

Ready to Hop into Easter Nail Magic?

Gather your favorite polishes and tools—it’s time to crack open your creativity! Discover 10 Egg-cellent Easter Nail Art Ideas for 2025 that are guaranteed to bring springtime joy to your fingertips and turn heads wherever you go.
✨ Don’t miss out—click below to explore the full Easter lookbook!

Read the Latest on Nails Tails!

Let Us Know Your Ideas and Suggestions